
TL;DR
Moving your rig out of sight is the biggest step in reducing noise. Proper placement, sealing gaps, and smart ventilation turn a closet into a quiet, functional studio. Foam alone won’t solve everything—consider the whole setup.
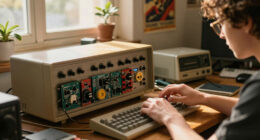
Cluttered, noisy, and echoey rooms are the enemy of good audio. But what if your small closet could become a quiet sanctuary for vocals or voice-over work? The secret isn’t just about adding foam or panels—it’s about where you put your rig and how you treat the space around it.
In this guide, you’ll learn how to turn a cramped closet into a surprisingly effective studio. From smart placement to sealing gaps, we’ll cover the real game-changers that make your workspace sound professional without tearing down walls.
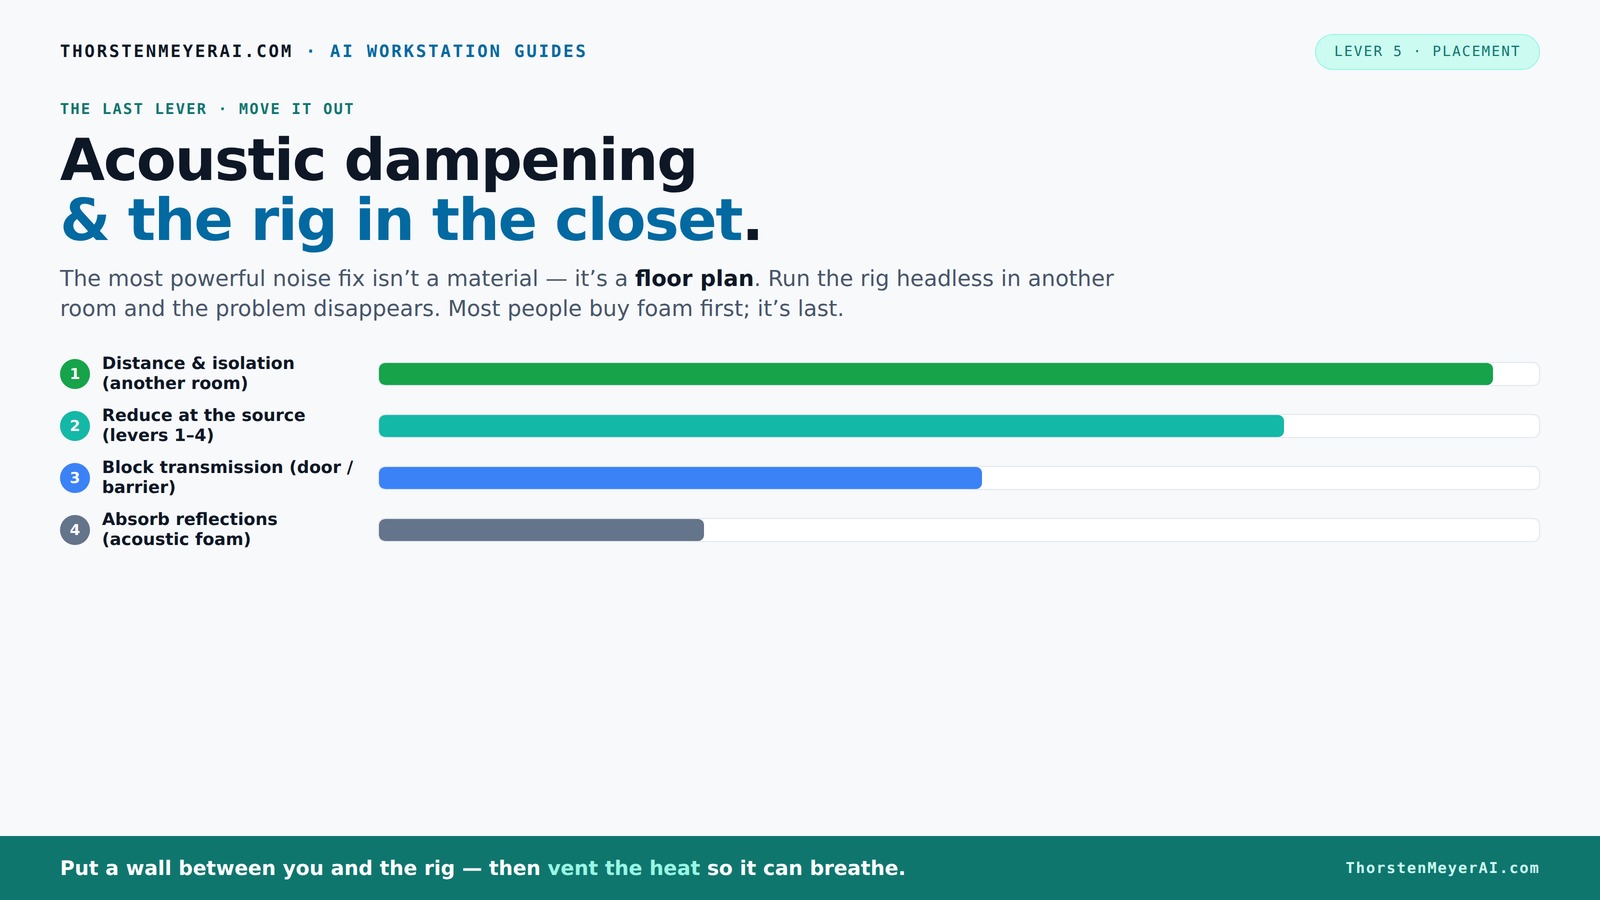
Acoustic dampening
& the rig in the closet.
The most powerful noise fix isn’t a material — it’s a floor plan. A rig you can’t hear because it’s in another room beats any amount of foam. Tap the approaches in Part 1 to see what actually works.
(another room)
(levers 1–4)
(door / barrier)
(acoustic foam)
Contain the noise, not the heat
Key Takeaways
- Moving your rig to a separate room is the most effective way to cut noise. Distance is your friend.
- Sealing gaps around doors and outlets is critical for true soundproofing, not just absorption.
- Proper placement of your microphone—away from walls and reflections—improves sound quality dramatically.
- Ventilation is essential if you place a hot rig in a closet; active airflow keeps temperatures safe and noise low.
- In small spaces, adding bass traps and thick absorptive layers in corners and walls prevents boomy low-end buildup.

Focusound 52 Pack Acoustic Foam Panels 1" x 12" x 12" Sound Proof Foam Panles Soundproofing Noise Cancelling Wedge Panels for Home Office Recoding Studio with 300PCS Double-Side Adhesive
Soundproofing - Acoustic foam panels triangular grooves structure for better noise absorption, helps to reduce and absorb unwanted...
As an affiliate, we earn on qualifying purchases.
As an affiliate, we earn on qualifying purchases.
Why Moving the Rig Is the Most Effective Noise Fix
The best way to cut noise is to put distance between your workspace and the source. A rig tucked into a closet on the other side of the house or in a basement is often quieter than any foam or paneling on your desk.
Distance matters because sound intensity decreases with the square of the distance from the source. When your rig is far away, the sound waves lose energy before reaching your microphone or your ears, effectively reducing perceived noise. This method also minimizes the need for extensive soundproofing in the immediate workspace, which can be complex and costly. Implementing this in real life often involves relocating noisy equipment to separate rooms or enclosures, and using remote control or network-based interfaces to operate the equipment without needing physical proximity.
For example, moving a high-noise machine to a basement or closet away from your primary recording area can dramatically reduce ambient noise, allowing for cleaner recordings with less effort on absorption or sealing.

XTUGA Recording Microphone Isolation Shield, High Density Absorbent Foam 5 Panels to Filter Vocal,Top Enclosed Foldable Soundproof Cover for Condenser Studio Equipment MIS02
REDUCES NOISE INTERFERENCE– The XTUGA Microphone isolation Shield has three layers that work in tandem to reduce noise...
As an affiliate, we earn on qualifying purchases.
As an affiliate, we earn on qualifying purchases.
The 'Rig in the Closet' Setup: Ventilation Is King
Placing a hot, high-load machine in a closet works wonders for noise if it can breathe. But trapping heat is a recipe for disaster. Overheating can cause hardware failures, reduce performance, and even pose safety risks. Additionally, excess heat can increase noise levels as fans work harder to cool components, creating a feedback loop of noise and heat buildup.
Proper airflow is essential to maintain safe operating temperatures and minimize fan noise. Active ventilation solutions—such as exhaust fans with ducting, intake vents, or even small air movers—help circulate air efficiently. The design should ensure that cool air enters the closet while hot air exhausts without creating turbulence or noise that leaks into the recording space. For serious setups, custom soundproof cabinets with ducted airflow and thermostatic control offer a balance between cooling efficiency and noise isolation. These systems allow the equipment to stay cool while preventing the noise from fans or airflow from contaminating the recording environment.
Failing to provide adequate ventilation can lead to overheating, which may cause hardware throttling, reduced lifespan, or catastrophic failure. Therefore, integrating active airflow solutions is a critical aspect of a functional, quiet rig setup in small spaces.

118” Wedge-Shape Foam Window Weather Stripping Door Seal Strip,Soundproofing Frame Winter Insulation Tape for Exterior Front Door,Noise Cancelling Window Inserts,Door Gap Filler Light Blocker,White
Upgraded Wedge Design: This window draft stopper features an upgraded wedge design, tapering from 5/32" to 11/32" (0.16"–0.35")...
As an affiliate, we earn on qualifying purchases.
As an affiliate, we earn on qualifying purchases.
Placement Strategies Inside a Closet: Where to Put Your Microphone and Gear
Placement inside a small closet makes or breaks your sound quality. The goal is to minimize reflections, standing waves, and bass buildup that can muddy your recordings. Positioning your microphone away from walls and corners reduces early reflections that cause comb-filtering effects, which can make vocals sound thin or hollow.
One effective strategy is to identify the first reflection points—these are spots where sound reflects directly from surfaces onto the mic. Using a mirror held against the wall while speaking or singing can help locate these points. Once identified, treating these spots with absorptive materials like foam panels or blankets can significantly improve clarity. Additionally, placing the microphone at least 6-12 inches from walls helps reduce proximity effect and low-frequency buildup. Avoiding parallel surfaces where reflections bounce back and forth creates a more balanced sound. Some setups benefit from using diffusers or angled panels to scatter reflections, further improving sound quality.
Proper internal placement also involves considering the room's acoustics—adding soft furnishings, hanging blankets, or foam in strategic locations can help control reflections and standing waves, leading to clearer, more natural recordings.

TroyStudio Portable Vocal Booth, Large Foldable Microphone Isolation Shield, Music Recording Studio Sound Echo Absorbing Box, Desk & Stand Use Reflection Filter with Thickened Dense Acoustic Foam
【BASIC INFO】: Inside size after setup: 8'' (L) X 10'' (W) X 12'' (H), large space for various...
As an affiliate, we earn on qualifying purchases.
As an affiliate, we earn on qualifying purchases.
Sealing Gaps and Leaks: The Hidden Key to Quiet and Clarity
Sealing gaps around doors, outlets, and vents is crucial for effective soundproofing. Even tiny cracks can act as sound leaks, allowing external noise to intrude and internal sound to escape. This results in a less controlled environment, where noise from outside sources can be picked up and your recordings can bleed noise into other areas. Learn more about sealing gaps and leaks to improve your setup.
Using weatherstripping around door frames, draft stoppers, and acoustic sealant on cracks and gaps can drastically reduce sound transmission. These materials create a physical barrier that blocks sound paths, making the space more isolated. For best results, inspect your setup carefully, and seal all potential leaks—pay special attention to door thresholds, window frames, electrical outlets, and vent openings. Sealing these leaks not only improves soundproofing but also enhances the overall acoustic environment by reducing unwanted noise and reflections bouncing around inside the space.
In practice, properly sealed spaces allow for more effective use of absorption and reflection treatments, as the environment becomes more controlled and predictable. The investment in sealing is often the most cost-effective way to improve sound quality without extensive structural modifications.
Absorption and Reflection Control in Small Spaces
Absorptive materials like blankets, rugs, and foam panels are essential for reducing echoes and flutter echoes inside your closet. These materials absorb sound energy, preventing reflections from bouncing around and creating a muddy or hollow sound. For more tips on acoustic treatment, visit home improvement techniques.
Research shows that covering approximately 20-30% of the walls with absorptive material can lead to a noticeable reduction in reverberation and improve clarity. In practice, layering blankets or hanging thick moving blankets a few inches from walls can be surprisingly effective without making the space look overly clinical. Strategic placement of these treatments—such as behind the mic, on the ceiling, and in reflective corners—can optimize sound absorption. The goal is to tame early reflections and reduce overall reverberation, creating a more controlled environment for vocal recordings.
It’s important to balance absorption with room size; over-treating small spaces can make them sound unnaturally dead. Instead, targeted placement combined with some diffusion can preserve natural sound while controlling problematic reflections.
Bass Traps and Handling Low Frequencies in Small Closets
Bass buildup is a common challenge in tiny spaces, especially where parallel walls and corners create resonances that amplify low frequencies. This can cause recordings to sound boomy, muddy, or uneven in the low end. Addressing this requires targeted treatment—bass traps—placed in corners and along walls where low-frequency energy concentrates.
Even in small spaces, installing bass traps made of dense materials like rockwool or mineral fiber can significantly improve clarity. These traps absorb low-frequency energy and prevent it from bouncing back and forth, reducing resonance and boominess. Proper placement—filling the corners and near the microphone—maximizes their effectiveness. Some DIY solutions include building bass traps from dense insulation wrapped in breathable fabric, which can be cost-effective and space-efficient.
Reducing bass buildup enhances vocal intelligibility and overall sound quality. For small closets, even a few strategically placed traps can make a substantial difference, leading to more balanced and professional-sounding recordings.
Floor Treatment: Why Rugs and Carpets Matter
Hard floors reflect sound, adding to echo and making your small space sound boxy. A rug or carpet under your mic or chair absorbs some of those reflections, softening the room's acoustics. This simple addition can have a surprisingly positive impact on clarity and warmth, especially if the floor is made of concrete, wood, or tile.
Placing a thick rug under your recording setup reduces high-frequency reflections and footstep noise, which can otherwise bleed into recordings or cause distractions. It also helps prevent sound from bouncing off the floor and creating comb-filtering effects in your recordings. Choosing a dense, plush rug is ideal, but even a layered blanket or carpet remnant can improve acoustic quality significantly.
This treatment not only improves sound quality but also adds comfort, making long recording sessions more pleasant. In small, echo-prone spaces, covering the floor with soft materials is an easy, effective step toward a more controlled environment.
When to Consider Upgrading Beyond Foam
Foam is effective at reducing high-frequency echoes but has limitations when it comes to blocking sound transmission. If noise leaks through walls, doors, or windows, or if low frequencies remain boomy despite foam treatment, more substantial measures are needed. These include adding mass to walls, damping vibrations, or re-insulating spaces to achieve better isolation.
Techniques such as installing thick drywall, applying Green Glue damping compound between layers, or adding full wall insulation can dramatically reduce sound transmission. These methods are more invasive and costly but are necessary for serious soundproofing, especially in shared or noisy environments. For example, adding a second drywall layer with damping material can cut noise leaks significantly, creating a more isolated recording space.
Evaluating your specific needs and noise sources will guide whether you should upgrade from basic foam treatments to these more advanced solutions. The goal is to balance soundproofing with practicality and budget, ensuring your small space remains functional and quiet.
Frequently Asked Questions
Can I really record good vocals in a closet?
Yes. Small closets with proper absorption and placement can produce clear, professional-sounding vocals. Focus on reducing reflections and sealing gaps for the best results.
Do I need foam, blankets, acoustic panels, or all three?
Start with layered blankets or thick curtains, then add foam panels where reflections are worst. For serious control, combine multiple materials for best absorption and sound quality.
Where should I place the mic inside the closet?
Place your mic at the first reflection point—usually a few inches from the wall—and keep it away from parallel surfaces. Use a mirror to find the best spot.
Should treatment go behind the mic or on the side walls?
Both matter. Focus on the first reflection points—behind and around the mic—plus the ceiling and corners for bass control. Layering is best.
How much wall coverage do I need?
20-30% coverage with absorptive material is enough for reducing echo in most small spaces. For maximum control, near-full coverage can be beneficial.
Conclusion
Turning a closet into a quiet studio isn’t about buying endless foam panels. It’s about smart placement, sealing leaks, and managing heat and reflections.
Remember, your best fix is often simply moving the rig out of sight. When you combine that with thoughtful treatment, you get a space that sounds good and stays cool—no matter how loud your machine gets.