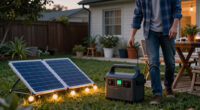
This guide walks you through setting up a solar backup power station: a battery unit combined with solar panels that stores electricity and powers your devices when the grid is down or you are off-grid. By the end, you will have a charged station, tested connections, and a working plan for which devices it will run and for how long.

Get backup power and energy gear delivered free — and shop member deals
- Fast, free delivery on millions of items
- Access to Prime Big Deal Days deals on October 6–7
- Prime Video, Amazon Music and more included

GRECELL Portable Power Station 500W, 519Wh Solar Generator
- ✔ Capacity: 519Wh / 140,400mAh
- ✔ AC Output: 2 x 110V pure sine wave, 500W total
- ✔ USB-C: 1 x PD 60W

ZeroKor 300W Portable Power Station with 60W Foldable Solar Panel
- ✔ Output Power: 300W max
- ✔ AC Outlets: 2 x 300W max
- ✔ USB Ports: 3 x 5V/3A, 1 x quick charge

Jackery Explorer 300 Portable Power Station, 292Wh Backup LiFePO4 Battery
- ✔ Capacity: 292Wh
- ✔ Output: 300W continuous, 600W surge
- ✔ Battery Chemistry: LiFePO4 (Lithium Iron Phosphate)
This guide is written for beginners. No electrical expertise is required. The task takes 2-4 hours of hands-on work, plus charging time (which can run overnight or take several sunny days depending on panel size). Most of the setup involves simple planning, plugging in, and testing — the equipment itself does the electrical work.
Difficulty: Beginner | Time: 2-4 hours (plus initial charging time)
What You’ll Need
Tools & Materials:
- A portable power station (solar generator) sized to your needs
- One or more portable solar panels with compatible connectors (MC4 to the station’s input port)
- A wall outlet for initial charging
- A phone or computer to check wattage labels on devices
- Optional: a plug-in power meter (kill-a-watt style) to measure device draw
Knowledge:
- Basic understanding of watts (W) and watt-hours (Wh) — explained in the steps below
- Ability to read the label on a device’s power adapter or plug
Buy the power station and panels together, or verify connector compatibility before purchasing separately. Station input ports vary (MC4, Anderson, 8mm barrel), and an adapter may be required. Check that the panel’s maximum output does not exceed the station’s solar input rating, which is printed in the manual and often on the unit itself.
GRECELL Portable Power Station 500W, 519Wh Solar Generator
The GRECELL earns the top spot because it solves the problem that matters most in a backup scenario: runtime. With 519Wh of stored energy, it holds roughly 78% more power than either the Jackery Explorer 300 or the ZeroKor, which translates directly into more hours of laptop charging, more phone recharges, and — critically — the ability to run a CPAP machine through the night, something the two smaller units struggle to guarantee. Its pure sine wave AC output is another meaningful differentiator: sensitive electronics like laptops and medical devices run cleaner and safer on it than on the modified sine wave output typical of budget stations in this class.The port selection is the most generous in this lineup, supporting up to ten devices at once across USB-C PD 60W, three quick-charge USB-A ports, two DC outputs, a car port, and even a 10W wireless charging pad on top. Compared with the Jackery, which tops out at 300W continuous output, the GRECELL’s 500W ceiling lets you pair devices more freely — a laptop and a small fan together, for instance, without tripping the inverter.The tradeoffs are real, though. Recharge times of 6–9 hours via solar are the slowest here, and the panel is not included, so budget for a 100W or 200W panel to take full advantage of the 200W solar input ceiling. It also uses standard lithium cells rather than the Jackery’s LiFePO4 chemistry, so expect a shorter service life, and it needs a top-up charge at least every three months. At a heavier carry weight than the Jackery, this is a station you station at home or base camp rather than one you sling over a shoulder on a hike.
Pros:
- Largest capacity in this lineup at 519Wh — enough for overnight CPAP or extended device charging
- Pure sine wave AC output is safe for laptops and medical equipment
- Ten output options including USB-C PD 60W, quick-charge USB-A, and wireless charging
- Accepts up to 200W of solar input for faster recharges than its size class typically allows
Cons:
- Solar panel sold separately
- Slow recharge times of 6–9 hours depending on method
- Standard lithium chemistry means shorter cycle life than LiFePO4 rivals
Best for: Households wanting blackout backup for laptops, phones, small appliances, and CPAP machines
Not ideal for: Buyers who need a complete solar kit in one purchase or an ultralight camping companion
Bottom line: The most capable all-around backup here — capacity, clean power, and port variety that the smaller units simply cannot match.
“The most capable all-around backup here — capacity, clean power, and port variety that the smaller units simply cannot match.”
ZeroKor 300W Portable Power Station with 60W Foldable Solar Panel
The ZeroKor wins on a simple but powerful point: it is the only option here that arrives as a complete solar generator. While the Jackery and GRECELL both require a separate panel purchase, the ZeroKor bundles a 60W foldable monocrystalline panel with 20.5% conversion efficiency, plus built-in MPPT regulation to squeeze the most out of available sunlight. For a first-time buyer, that means the box you open is the system you own — no compatibility research, no surprise expenses.Where it falls short of the GRECELL is capacity and refinement. Its 300W output ceiling and smaller battery place it closer to the Jackery in capability, and its port selection — three standard USB-A ports and one quick-charge port — lags well behind the GRECELL’s PD 60W and wireless charging. It also lacks pure sine wave AC, so it is better matched to lights, fans, phones, and small tools than to delicate electronics. The junction box on the solar panel is not waterproof, so you will want to keep that end shaded or sheltered while charging outdoors.What you get in exchange is genuine off-grid self-sufficiency at the lowest entry point in this comparison. The station’s BMS protection covers short circuits, over-current, over-voltage, overload, and overheating, with an auto cooling fan for reassurance. One maintenance note: the unit needs regular charge cycles to avoid entering a protection state, so it rewards buyers who use it rather than leave it shelved for a year.
Pros:
- Includes a 60W foldable monocrystalline solar panel — a complete kit out of the box
- Built-in MPPT controller maximizes solar charging efficiency
- Three recharge methods: AC outlet, solar, and 12V carport
- Comprehensive BMS safety protection with automatic cooling fan
Cons:
- Capped at 300W — cannot run coffee makers, hair dryers, or pumps
- Solar panel junction box is not waterproof
- Requires regular charging cycles to avoid entering protection mode
Best for: Budget-conscious buyers and beginners who want a working solar backup system without buying anything else
Not ideal for: Anyone who needs to power laptops long-term, CPAP devices, or anything approaching 500W
Bottom line: The cheapest path to a genuinely solar-rechargeable backup system, as long as your needs stay small.
“The cheapest path to a genuinely solar-rechargeable backup system, as long as your needs stay small.”
Jackery Explorer 300 Portable Power Station, 292Wh Backup LiFePO4 Battery
The Jackery Explorer 300 is the pick when weight and longevity matter more than raw capacity. At roughly 7 pounds with an integrated carry handle, it is dramatically easier to move than the GRECELL, and its LiFePO4 battery chemistry — unique in this lineup — is rated for 4,000+ charge cycles to 70% capacity, which Jackery translates to around eleven years of use. The ZeroKor and GRECELL use conventional lithium cells that will degrade noticeably sooner, making the Explorer 300 the strongest long-term investment per watt-hour despite its smaller size.Its 300W continuous output (600W surge) matches the ZeroKor, but the Jackery pulls ahead on charging speed and port quality: a 100W USB-C PD port outclasses anything the ZeroKor offers, and solar recharge to 80% takes roughly 2.8 hours with a 100W panel — far quicker than the GRECELL’s 6–9 hour full-charge window. Compared with the GRECELL, the obvious sacrifice is capacity: 292Wh will keep phones, cameras, drones, and a laptop fed on a weekend trip, but it is not the unit you want running overnight medical equipment during a multi-day outage.The main frustration is that the solar panel is sold separately, so like the GRECELL, the advertised solar capability costs extra to unlock. Still, for campers, hunters, and travelers who prioritize carrying less and keeping a station for a decade rather than maximizing runtime, this model makes the most sense.
Pros:
- Ultra-lightweight at roughly 7 pounds with an integrated carry handle
- LiFePO4 chemistry rated for 4,000+ cycles — roughly eleven years of service
- 100W USB-C PD port charges laptops faster than rivals in this class
- Fast solar recharge: 80% in about 2.8 hours with a 100W panel
Cons:
- Solar panel sold separately
- 300W output cannot handle high-power appliances
- 292Wh capacity limits runtime compared with the GRECELL
Best for: Campers, travelers, and buyers who want a light, durable station that will last a decade of light-duty use
Not ideal for: Anyone backing up power-hungry appliances or needing multi-day outage coverage
Bottom line: The lightest and longest-lasting option here — a decade-proof companion for travel, as long as your power needs stay modest.
“The lightest and longest-lasting option here — a decade-proof companion for travel, as long as your power needs stay modest.”
As an Amazon Associate we earn from qualifying purchases.
Before You Start
Do three things before opening any boxes. First, confirm the station’s capacity in watt-hours (Wh) — this number determines how long it will run your devices. Second, list the devices you want to power during an outage (for example: refrigerator, phone chargers, router, CPAP machine, a few lamps). Third, note each device’s wattage from its label or adapter. If a device lists amps instead of watts, multiply amps by 120 (in North America) to get watts. This list is what you will use to size and test your setup.
Safety note: portable power stations are safe for indoor use, unlike gasoline generators. Never attempt to open the unit, and keep panels dry on their electrical connections. Do not use the station’s AC outlets in wet conditions.
Step-by-Step Instructions
Step 1: Calculate your power needs
Add up the running wattage of the essential devices on your list. Then estimate how many hours per day each device runs during an outage. Multiply each device’s watts by its hours to get daily watt-hours, and add those numbers together. For example: a refrigerator drawing 150W running roughly 8 equivalent hours per day uses about 1,200Wh daily; phone and laptop charging together might add 100Wh; a router at 10W for 12 hours adds 120Wh. Your total is roughly 1,400Wh per day.
Tip: Refrigerators cycle on and off, so count only actual compressor run time (typically 30-50% of the day), not 24 hours.
Check: You have a single number: total daily watt-hours needed. If it is close to or above your station’s capacity, plan to recharge with solar during the day or reduce the device list.
Step 2: Verify the station can handle your highest-draw device
Find the station’s rated inverter output in watts (for example, 1,000W or 2,000W). Confirm it exceeds the running wattage of your largest device. Then check the station’s surge rating — motors in refrigerators, freezers, and pumps draw 2-4 times their running wattage at startup, and the surge rating must cover that burst.
Tip: If your refrigerator lists 150W running, assume up to 600W at startup. A station with a 1,000W inverter and 2,000W surge handles this comfortably.
Check: Every device on your list has a running wattage below the inverter rating, and the highest startup surge is below the surge rating.
Step 3: Charge the station fully from wall power
Plug the station’s AC charging cable into a wall outlet and connect it to the station’s input port. Turn the unit on if required. Most stations display a charge percentage on a screen. Leave it until the display reads 100%.
Tip: Always do the first full charge indoors from wall power — it is much faster than solar and gives you a known-full starting point for testing.
Check: The display shows 100% and the charging indicator stops flashing or turns green.
Step 4: Test your critical devices one at a time
With the station fully charged, plug in your highest-priority device (usually the refrigerator) and run it for at least 30 minutes. Watch the station’s display: note the output wattage it reports while the device runs. Then repeat with your other essential devices, briefly, to confirm each starts and runs.
Tip: Test the refrigerator through its startup surge now, during a non-emergency, so any overload warning happens when you can respond calmly.
Check: Each device starts without the station triggering an overload alarm, and you have written down the running watts the station reports for each one.
Step 5: Connect the solar panels and do a test charge
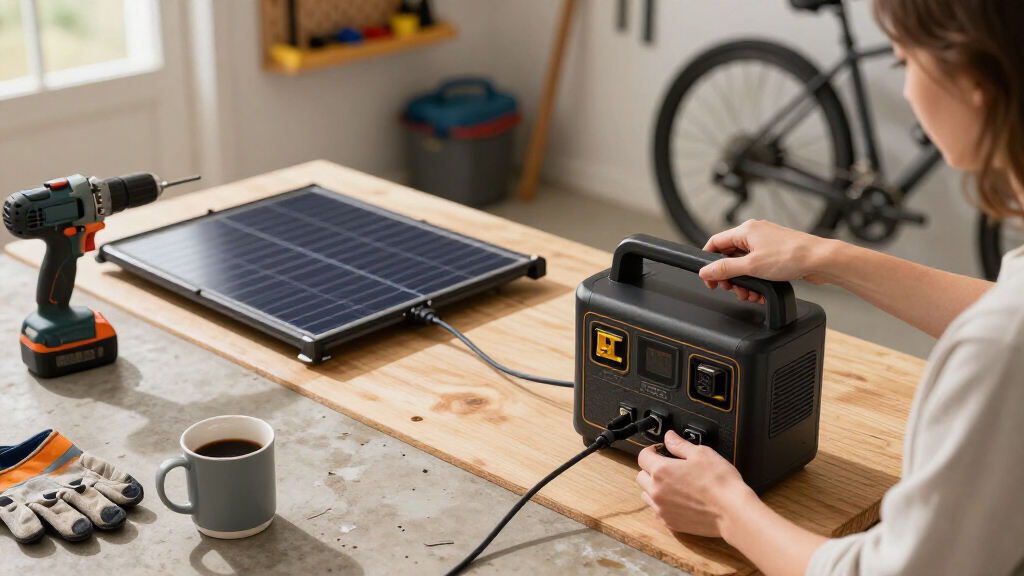
Take the panels outdoors on a sunny day. Set them up facing the sun, tilted so sunlight strikes them squarely — prop them against a chair or use the panel’s kickstand. Connect the panel cable to the station’s solar input port (using the correct adapter if needed), then check the station’s display for incoming solar watts. Move the panels every couple of hours to keep them facing the sun as it moves.
Tip: Partial shade on even one corner of a panel can cut output dramatically. Reposition rather than accept low numbers.
Check: The station shows solar input wattage close to the panel’s rated output in full sun (60-85% of rating is normal in real conditions). If it reads zero, recheck connections and panel orientation.
Step 6: Calculate your real runtime
Divide the station’s watt-hour capacity by your total device wattage, then multiply by about 0.85 to account for conversion losses. For example, a 1,000Wh station running a 100W load: 1,000 ÷ 100 × 0.85 = roughly 8.5 hours. Redo this with the actual watt numbers the station reported during your tests.
Tip: Refrigerator runtime is the number most people care about — calculate it separately using its cycling pattern rather than continuous draw.
Check: You have a written estimate of how many hours or days your station will run your essential list, and how many sunny hours it needs to recharge.
Step 7: Create your outage plan and store the equipment
Write a one-page plan: which devices connect in what priority order, where the station and panels are stored, and the recharge plan (panel placement spot outdoors, cable routing). Store the station at 50-80% charge in a cool, dry indoor location, away from freezing temperatures. Keep cables and adapters with the unit in the same container or shelf.
Tip: Plan to top up the station to full charge when an outage is forecast, and recharge it to 50-80% after each use for battery health.
Check: Anyone in your household could find the station, read the plan, and start it up without you present.
Step 8: Maintain the system on a schedule
Set a recurring reminder every 2-3 months to check the station’s charge level and top it up to at least 70% if it has drained. Once every six months, run a full test: power a device from the station and do a short solar charge to confirm everything still works.
Tip: Lithium batteries self-discharge slowly, but a station left at 0% for a year can be permanently damaged. The reminder prevents this.
Check: Your calendar reminder is set, and each check confirms the station holds charge and the panels still produce power.
Common Mistakes to Avoid
- Buying a station too small for the refrigerator — Refrigerators are the most common disappointment. Check startup surge against the station’s surge rating and expect 800-1,000Wh of usable capacity for a full day of refrigeration before solar recharge.
- Panels placed flat or in partial shade — Tilt panels toward the sun and move them during the day. Flat panels can lose 20-30% output; a shadow across one cell can cut output by half or more.
- Assuming nameplate panel wattage equals real charging speed — Expect 60-85% of rated wattage in good sun. A 200W panel realistically delivers 120-170W. Size your recharge expectations accordingly.
- Storing the station empty or in a freezing garage — Store at 50-80% charge in a heated or temperature-stable space. Lithium batteries degrade if stored fully empty or below freezing for extended periods.
Troubleshooting
Problem: Station shows zero solar input on a sunny day
Solution: Check the panel-to-station connection first — mismatched or partially seated connectors are the most common cause. Then confirm the panel’s voltage is within the station’s input range. Finally, re-aim the panels directly at the sun and clear any dust or debris.
Problem: Station shuts off or alarms when the refrigerator starts
Solution: The startup surge exceeds the inverter rating. Try the refrigerator alone with nothing else plugged in. If it still trips, the station is undersized for that appliance — run smaller loads only, or upgrade to a higher-wattage station.
Problem: Station drains much faster than expected
Solution: Check the output wattage on the display against your estimates. Likely causes: the refrigerator is cycling more than expected, a device with a hidden draw (like a TV in standby) is connected, or the station’s capacity is lower than assumed after conversion losses. Remove non-essential loads.
Problem: Station will not hold charge in storage
Solution: If it drops several percent per week, the battery may be aging or a feature (Wi-Fi, always-on display) is drawing power. Disable idle features, and if drain continues, contact the manufacturer — many units carry 2-5 year warranties.
What Success Looks Like
Your setup is complete when all of the following are true: the station reaches and holds a 100% charge from wall power; every device on your essential list starts and runs from the station without overload alarms; the solar panels deliver measurable input on a sunny day; you have a written runtime estimate based on tested wattage; and the equipment is stored with a written plan that a household member can follow without you.
Next Steps
After your system is running, consider expanding it: add a second panel to halve recharge time, or add a battery unit to double runtime if your station supports expansion. If you want whole-house backup beyond a portable station, research fixed battery systems and transfer switches, which require a licensed electrician. Repeat your six-month functional test indefinitely, and replace batteries according to the manufacturer’s cycle-life specification (often 800-3,000 cycles, roughly 3-10 years of typical use).
Frequently Asked Questions
How big a power station do I need to run a refrigerator?
For a typical modern refrigerator, plan on a station with at least 800-1,000Wh of capacity and a 1,000W inverter with 2,000W surge rating. That covers roughly 24 hours of refrigeration before you need to recharge with solar.
Can I use a power station while it is charging from solar?
Yes. Nearly all modern stations support pass-through charging: panels charge the battery while the battery powers your devices. Note that heavy loads can outpace solar input, so the battery still drains — just more slowly.
How long do solar panels take to recharge a station?
Divide the station’s capacity by your panels’ realistic output. A 1,000Wh station with a 200W panel delivering about 150W in good sun needs roughly 7 hours of strong sunlight for a full recharge from empty.
Are these safe to use indoors during an outage?
Yes. Unlike gas generators, battery power stations produce no exhaust and are designed for indoor use. Keep them dry and away from heat sources, and keep the solar panel cables’ outdoor connections protected from rain.
Do solar panels work on cloudy days or through windows?
Cloudy days typically produce 10-25% of rated output. Windows block much of the usable light, especially glass with low-E coating — expect a fraction of full output indoors. Place panels outside whenever possible.
Fall Picks
fall essentials
As an affiliate, we earn on qualifying purchases.