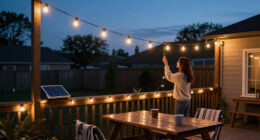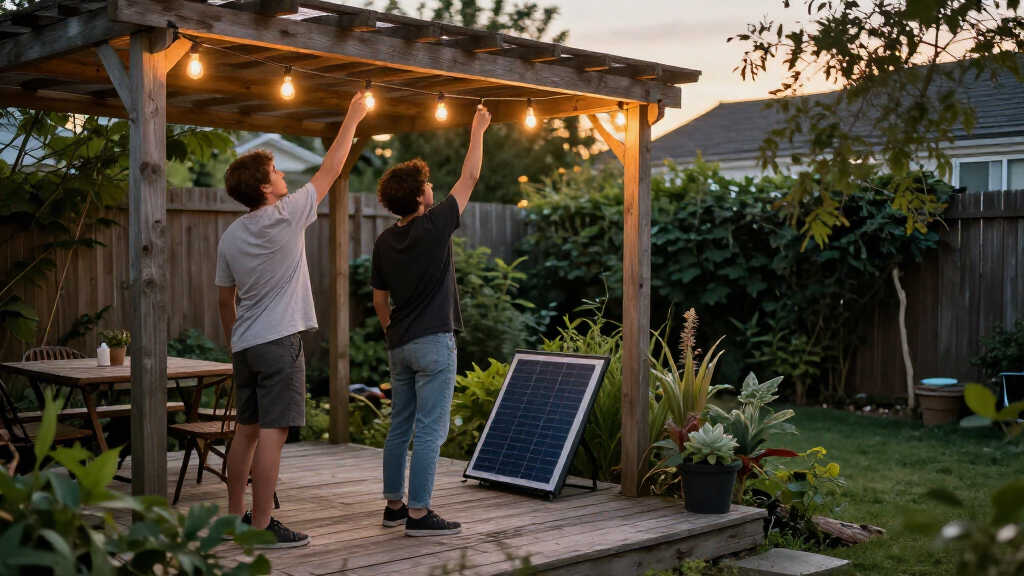
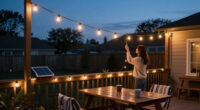
Install solar-powered outdoor string lights by choosing a sunny panel location, planning a safe route, mounting the lights, and checking their nighttime operation. This guide is for beginners setting up lights on a patio, balcony, fence, or garden structure. Allow 1-2 hours for installation and up to two sunny days to judge charging performance.

Get backup power and energy gear delivered free — and shop member deals
- Fast, free delivery on millions of items
- Access to Prime Big Deal Days deals on October 6–7
- Prime Video, Amazon Music and more included
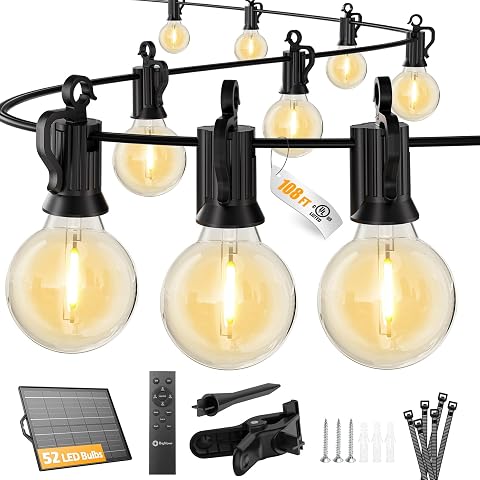
Brightown 108 ft Solar String Lights with Remote and USB Charging
- ✔ Length: 108 ft
- ✔ Bulbs: 50 LED bulbs plus 2 spares
- ✔ Bulb spacing: 2 ft

Brightown 100 ft Solar String Lights with 31+2 Shatterproof LED Bulbs
- ✔ Length: 100 ft
- ✔ Bulbs: 31 LED bulbs plus 2 spares
- ✔ Color temperature: 2700 K warm white
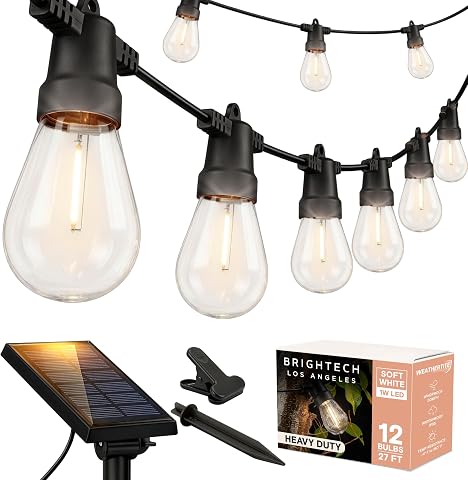
Brightech Ambience Pro Solar-Powered Outdoor String Lights, 27 ft, 12 Shatterproof LED Bulbs
- ✔ Length: 27 ft
- ✔ Bulbs: 12 S14 LED bulbs
- ✔ Light color: Soft white, 3000 K
Difficulty: Beginner | Time: 1-2 hours, plus 1-2 sunny days for charging and testing
What You’ll Need
Tools & Materials:
- Solar-powered outdoor string light set with panel, mounting hardware, and instructions
- Tape measure
- Pencil or removable marker
- Ladder, if mounting above ground
- Screwdriver or drill and compatible bit, if the surface requires screws
- Outdoor-rated hooks, clips, or cable ties compatible with the mounting surface
Knowledge:
- Basic measuring and hand-tool use
- Ability to identify a stable mounting surface and use a ladder safely
Check the product instructions for weather rating, maximum span, mounting hardware, and initial charging requirements. Check local rules or rental terms before drilling into a building. Ask another person to steady the ladder when needed.
Brightown 108 ft Solar String Lights with Remote and USB Charging
For buyers who want one strand to reach across a broad patio, fence, or yard, this Brightown set offers the most coverage in our lineup. Its 108-foot length and 50 warm-white bulbs give it a fuller run than the 100-foot Brightown, which has 31 bulbs, though bulb placement and the shape of your space will affect how evenly either strand illuminates it. The 108-foot option also lists up to 36+ hours of runtime, the longest figure here.Its strongest practical advantage is charging flexibility. Solar power keeps the setup cordless, while USB-C charging gives us another route when sunlight has been limited or we want to prepare the lights before an event. The remote adjusts brightness across four settings, selects among three modes, and sets a six- or eight-hour timer. Those controls make it easier to create a softer everyday glow or brighter task lighting without walking to the panel. IP65 protection and shatterproof bulbs suit outdoor installation, and the included cable ties help with mounting. The limitation is that the strand cannot connect to additional strands, so buyers who need more than 108 feet must plan separate lighting. Its solar charging still depends on sunlight, and USB-C is the fallback rather than a way to extend the strand.
Pros:
- 108-foot strand with 50 warm-white bulbs and two spares
- Solar and USB-C charging provide two charging options
- Remote controls four brightness levels, three modes, and a timer
- IP65-rated design with shatterproof bulbs and mounting accessories
Cons:
- Cannot connect to additional strands
- Solar charging performance depends on available sunlight
Best for: Buyers lighting a large patio or outdoor entertaining area who want remote controls, a long stated runtime, and USB-C charging as a backup.
Not ideal for: Anyone who needs connectable strands, a mains-powered option, or a small set sized for a compact balcony.
Bottom line: Choose this Brightown when broad coverage and charging flexibility matter more than connecting multiple strands.
“Choose this Brightown when broad coverage and charging flexibility matter more than connecting multiple strands.”
Brightown 100 ft Solar String Lights with 31+2 Shatterproof LED Bulbs
This 100-foot Brightown is a capable alternative for shoppers who want the convenience of a remote and dual charging without needing the longest strand in the group. Like the 108-foot model, it supports solar and USB-C charging, offers four brightness settings, and includes three lighting modes and timers. Its IP65 rating and shatterproof PET bulbs also make it a practical fit for outdoor use. The key difference is the lighting layout: 31 bulbs plus two spares cover 100 feet, compared with 50 bulbs across the 108-foot version. Buyers who prefer a more open run may find that appealing; those wanting more bulbs along the span should consider the longer set.The stated runtime reaches up to 26 hours, which is shorter than the 108-foot pick’s listed 36+ hours but still gives this model a useful advantage over Brightech’s five-to-six-hour figure. Solar charging is listed at seven to eight hours, while USB-C takes about four, so the backup charging option matters if the panel cannot collect enough sun. One operational quirk is its built-in light sensor: daytime use may require covering the solar panel. The listed wind resistance of up to 50 MPH adds reassurance for exposed locations, but buyers should still mount the cable securely. This model suits shoppers seeking remote-control features and long coverage, while the 108-foot Brightown is the stronger choice when bulb count and maximum stated runtime lead the decision.
Pros:
- 100-foot cord with 31 shatterproof bulbs and two spares
- Solar and USB-C charging options
- Remote offers four brightness levels, three modes, and timers
- IP65 rating and listed wind resistance up to 50 MPH
Cons:
- Listed runtime is shorter than the 108-foot Brightown
- Solar charging is specified at seven to eight hours
- The sensor may need the panel covered for daytime use
Best for: Buyers who want a long outdoor run with remote dimming, timers, and both solar and USB-C charging.
Not ideal for: Shoppers prioritizing the highest bulb count or longest stated runtime, or those who want to avoid managing the solar panel sensor.
Bottom line: Pick this model for long coverage and remote features if the 108-foot option’s higher bulb count and runtime are not priorities.
“Pick this model for long coverage and remote features if the 108-foot option’s higher bulb count and runtime are not priorities.”
Brightech Ambience Pro Solar-Powered Outdoor String Lights, 27 ft, 12 Shatterproof LED Bulbs
Brightech takes a different approach from the two Brightown sets: it is a compact, solar-only strand for a smaller seating area, rather than a long run with a remote and backup charging. At 27 feet with 12 S14 bulbs, it is easier to size for a balcony, a small patio, or a short stretch above a table. Its soft white 3000K light gives the setup a defined warm tone, while the detachable solar panel can be positioned with its stake or clip. That panel placement can help find a sunnier spot even when the lights themselves hang under an eave.The tradeoff is runtime and weather protection. A full charge is listed at about five to six hours, far below either Brightown’s stated maximum, so this is better suited to dinner or early-evening use than all-night illumination. Its IPX4 weather resistance is also a lower listed level than the IP65 ratings on the Brightown options, a distinction to consider when choosing an exposed installation. In exchange, Brightech keeps the setup straightforward and includes a two-year limited warranty. Choose it when a short solar-only strand is the right scale; move up to Brightown if you need longer coverage, longer listed runtime, remote controls, or USB-C charging.
Pros:
- Compact 27-foot length with 12 shatterproof S14 LED bulbs
- Detachable solar panel includes a stake and clip for placement
- Soft white 3000K light suits outdoor seating
- Includes a two-year limited warranty
Cons:
- Solar-only charging, with no USB-C backup
- Full-charge runtime is about five to six hours
- IPX4 rating is below the IP65 ratings of the Brightown sets
Best for: People lighting a small patio, balcony, or dining nook who want a short solar-only strand and detachable panel placement.
Not ideal for: Buyers who need all-evening runtime, remote dimming, USB-C charging, or a long strand with stronger listed weather protection.
Bottom line: Choose Brightech for a small space and uncomplicated solar lighting, provided its shorter runtime fits your evenings.
“Choose Brightech for a small space and uncomplicated solar lighting, provided its shorter runtime fits your evenings.”
As an Amazon Associate we earn from qualifying purchases.
Before You Start
Choose a dry day and inspect the route for overhead wires, doors, gates, walkways, and places where people could snag the cable. Keep the lights and panel away from heat sources and standing water. Do not install where the string could fall across a power line or block an exit.
Many sets need the switch turned on before charging or have a pull tab that must be removed from the battery compartment. Follow the included instructions for your model. Solar lights depend on daylight; shade, short winter days, dirt, and cloudy weather can reduce their runtime.
Step-by-Step Instructions
Step 1: Choose a sunny panel location
Find a spot that receives several hours of direct sunlight during the day, such as an open part of a roof edge, fence, or garden bed. Check the area at different times if nearby trees or buildings may cast shadows. Position the panel so its cable can reach the light string without crossing a walkway or being stretched tight.
Tip: A panel can be mounted separately from the lights if the set includes a long enough lead. Follow the manufacturer’s orientation guidance.
Check: The panel has a clear path to daylight and can connect to the string without pulling on either cable.
Step 2: Measure and plan the light route
Measure the distance along the route where you want the bulbs to hang. Compare it with the usable length of the string, accounting for the lead between the panel and first bulb. Mark the planned clip or hook locations and decide where the string can be supported without crossing doors, gates, or walking paths.
Tip: Allow a slight, even dip between supports if the product permits it. Do not leave long unsupported spans or use the wire itself to carry structural loads.
Check: The route fits the set and has a support point at each end and at the intervals stated by the manufacturer.
Step 3: Check the mounting surfaces
Inspect each planned support point for stability. Use outdoor-rated hooks or clips made for the surface, and select screws suited to the material when drilling is permitted. Avoid attaching hardware to loose boards, fragile trim, or branches that sway heavily.
Tip: Do not staple through the cable or pinch it under a door or window. That can damage the insulation and cause the lights to fail.
Check: Every support point can hold the light string without sharp edges pressing into its wire.
Step 4: Prepare and test the set
Unpack the string and inspect the cable, bulbs, panel, and connector for damage. Remove any battery pull tab, connect the panel, and set the switch or mode as the instructions specify. If the set has a test function, cover the panel to simulate darkness and confirm that the lights turn on.
Tip: Some sets turn on only when the panel senses darkness. A daytime test may require covering the panel or using the product’s test button.
Check: The components are intact and the set responds to the test method described in its instructions.
Step 5: Mount the solar panel
Attach the panel to the chosen support using the supplied bracket or compatible outdoor hardware. Angle and orient it as directed by the manufacturer, then tighten the fasteners enough to prevent movement. Leave room to reach the switch and clean the panel.
Tip: Keep the panel connector and cable from hanging where water can pool around the connection. Do not modify sealed connectors.
Check: The panel is secure, faces the intended sunlight, and its cable is not taut or trapped.
Step 6: Install the string supports
Fit hooks or clips at the marked points, following the hardware instructions for the surface. If using a ladder, place it on firm, level ground and avoid overreaching. Ask someone to steady it when appropriate, and move the ladder instead of leaning sideways.
Tip: Use a nonconductive ladder and stay well clear of overhead electrical lines. If a planned location is near a wire, choose another route.
Check: The supports are firmly attached and spaced to support the string along its full route.
Step 7: Hang the lights and secure the cable
Starting at the end nearest the panel, place the string into each hook or clip without pulling hard on the bulbs or connectors. Leave the modest slack recommended by the product instructions, and keep the cable clear of sharp corners, moving parts, and places where people walk. Secure any excess cable loosely with an outdoor-rated tie.
Tip: Do not coil excess cable tightly around the panel or wrap it around a hot fixture. Keep connectors accessible for inspection.
Check: The bulbs hang evenly, the cable is supported, and no section is stretched, pinched, or in a walking path.
Step 8: Set the operating mode and charge
Turn the set on and select the desired mode, such as steady or flashing, if available. Place the panel in direct sun for the charging period specified in the instructions. Keep its surface uncovered and wipe away dust or leaves with a soft, damp cloth when needed.
Tip: Some products require a full sunny day or longer before their first full night of operation. Do not judge runtime after a shaded or cloudy day.
Check: The switch is on, the selected mode is set, and the panel has had the recommended exposure to sunlight.
Step 9: Check the installation after dark
After sunset, check that the lights turn on and illuminate the intended area. Look for dark sections, loose clips, cable movement in the wind, or glare into windows. If the lights do not come on, cover the panel briefly to confirm that darkness detection is working, then check the switch and connections.
Tip: Observe the set for a full evening and again after a sunny day before deciding that its runtime is inadequate.
Check: The lights turn on as expected, remain supported, and provide useful illumination without creating a trip hazard.
Common Mistakes to Avoid
- Mounting the panel where a roof edge, tree, or wall shades it for much of the day. — Check the panel location across the day and move it to a sunnier position if shadows cover it for long periods.
- Stretching the string tightly between supports or leaving a long span unsupported. — Measure first, follow the stated support spacing, and leave the slack recommended by the manufacturer.
- Fastening through the cable or trapping it in a door or window. — Attach only at intended support points and route the wire away from moving parts and sharp edges.
- Assuming the set is faulty after a short or cloudy first charge. — Follow the first-charge instructions and evaluate nighttime runtime after a sunny day.
Troubleshooting
Problem: The lights do not turn on after dark.
Solution:
Check that the switch is on, the panel connector is fully seated, and any battery pull tab has been removed. Clean the panel and cover it to test darkness detection. Charge it in direct sun for the period specified by the instructions, then check again.
Problem: The lights turn on but go out early.
Solution:
Move the panel away from shade, clean its surface, and allow a full sunny day to recharge. Check whether the mode uses extra power, and choose a lower-power setting if available. Cold weather and short winter days can also reduce runtime.
Problem: Only part of the string lights up.
Solution:
Turn the set off, then check for a loose connector, damaged wire, or loose replaceable bulb. Reseat connections only as the instructions allow. Replace a bulb only with the specified type; do not open sealed sections.
Problem: The string sags, shifts, or rattles in wind.
Solution:
Add compatible support points, tighten loose mounting hardware, and reduce unsupported spans. Keep the cable slack enough to avoid strain, but secure it so it cannot swing into glass, branches, or a walkway.
What Success Looks Like
The panel is secure in a sunny position, the cable follows a supported route without pinching or crossing a walkway, and the lights turn on after dark. After a sunny charging day, they should provide the runtime stated by the product maker under similar conditions. Recheck the mounting points after the first windy night.
Next Steps
Clean the panel when dust, pollen, or leaves collect on it, and inspect the cable and fasteners after storms. Store removable lights dry and protected during severe weather if the manufacturer recommends removal. Replace rechargeable batteries only with the specified type and follow the product’s disposal guidance.
Frequently Asked Questions
How much sunlight do solar string lights need?
Requirements vary by model. Many need several hours of direct sunlight to charge well. Check the included instructions and keep the panel out of shade; cloudy weather and short winter days reduce charging.
Can I mount the solar panel away from the lights?
Yes, if your set has a separate panel and its lead reaches the sunny location without being stretched or routed through a hazard. Follow the maker’s guidance for panel placement and cable routing.
Why do the lights work only when I cover the panel?
The panel may sense daylight and keep the lights off while it is bright. Covering it simulates nighttime for a quick test. Remove the cover after testing so the panel can charge.
Can I leave outdoor solar lights up in rain?
Check the product’s weather rating and instructions. Keep connectors fitted as designed, avoid standing water, and take the set down if the maker advises removal during storms or freezing weather.
Evergreen bestsellers Picks
bestsellers
As an affiliate, we earn on qualifying purchases.