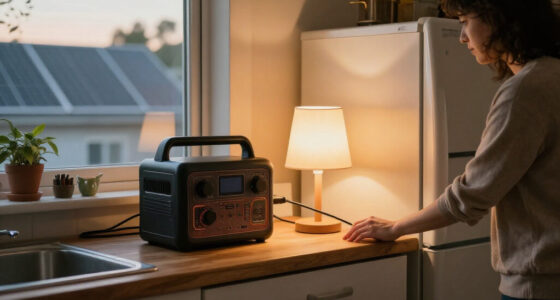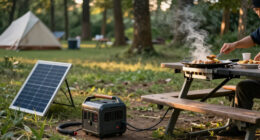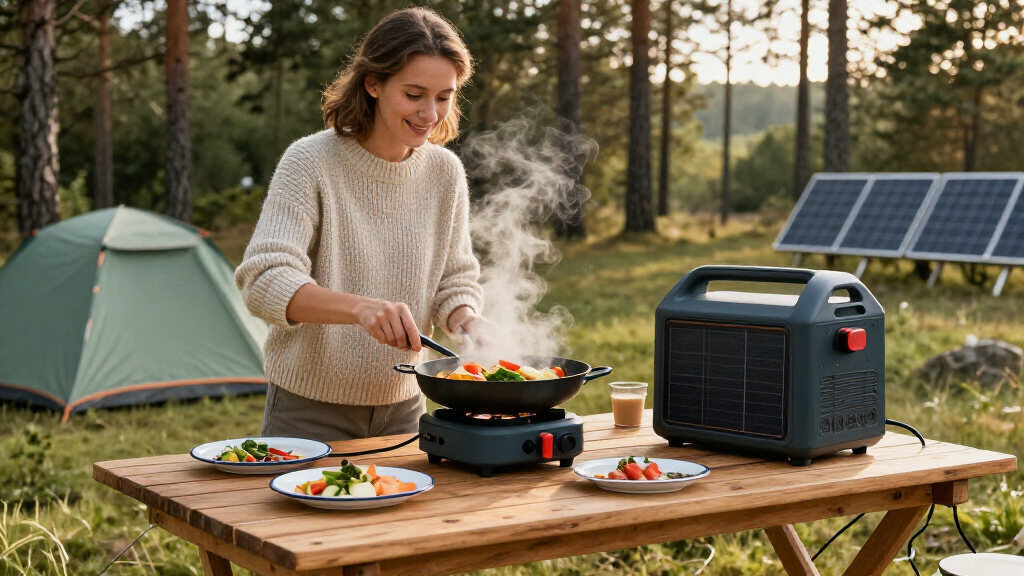
Use this guide to check whether a portable solar generator can run your outdoor cooking appliances, prepare a safe setup, and confirm the system works before cooking. It is for beginners planning a campsite, picnic, or backyard meal with electric cooking gear. Allow 1–2 hours for research and setup, plus the time needed to charge the generator, which depends on its battery level, solar panel, and sunlight.

Get backup power and energy gear delivered free with Prime
- Fast, free delivery on millions of items
- Prime Video, Amazon Music and more included
- Member-only deals all year

Jackery Solar Generator 1000 v2 and 200W Solar Panel, 1024Wh LiFePO4 Battery
- ✔ Battery capacity: 1,024Wh
- ✔ Rated AC output: 1,500W
- ✔ Peak output: 3,000W

Portable Solar Generator with Panel, 300W Portable Power Station with Foldable Solar Panel 40W
- ✔ Battery capacity: 280Wh
- ✔ Rated AC output: 300W
- ✔ Starting wattage: 550W listed
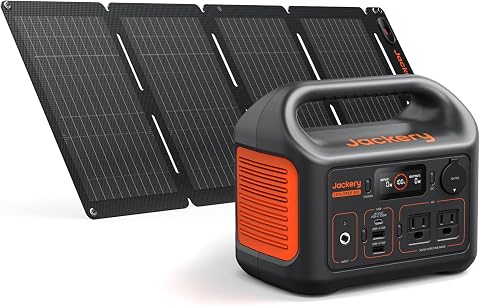
Jackery Solar Generator 300 and 40W Solar Panel, 292Wh, 300W AC
- ✔ Battery capacity: 292Wh
- ✔ Rated AC output: 300W
- ✔ Peak output: 600W
Difficulty: Beginner | Time: 1–2 hours for planning and setup; charging time varies
What You’ll Need
Tools & Materials:
- Portable power station with a built-in battery and a suitable AC outlet or DC port
- Compatible solar panel and the correct charging cable, if you plan to charge from sunlight
- Cooking appliance with its rated wattage and voltage listed on its label or manual
- Appliance manual and power station manual
- Outdoor-rated extension cord, if needed and permitted by the manuals
- Food thermometer for checking cooked food
Knowledge:
- Basic ability to read appliance wattage and power station specifications
- Basic food safety, including checking safe internal cooking temperatures
Plan around electric appliances such as a small induction cooker, electric kettle, or compact slow cooker. A solar power station cannot directly power a fuel-burning grill or stove. Never use a generator, power station, or fuel-burning cooker in an enclosed tent, vehicle, or room. Follow the manuals and local fire rules.
Jackery Solar Generator 1000 v2 and 200W Solar Panel, 1024Wh LiFePO4 Battery
For outdoor cooking with an electric appliance, the Jackery Solar Generator 1000 v2 has the most useful headroom in this group. Its 1,500W rated AC output and 3,000W peak give it a much broader appliance range than either 300W option. That does not mean every hot plate or kettle will work: check the appliance’s running draw against 1,500W, and remember that a peak rating is not the same as sustained output.The 1,024Wh battery also gives us more energy to work with than the ZeroKor’s 280Wh or Explorer 300’s 292Wh. Capacity still has limits. A high-draw cooker can use that stored energy quickly, and the bundled 200W panel cannot be assumed to replace energy as fast as cooking consumes it. Its 23.3 lb listed weight makes this a car-camping choice, not the grab-and-go pick; the Explorer 300 is far easier to carry at 7.5 lb.With LiFePO4 chemistry, multiple output types, and app-controlled charging modes, the 1000 v2 is the most versatile station here for a campsite where electric cooking is a real priority. We should skip it if our meal plan needs only phones, lights, and a small low-wattage device: the lighter Jackery 300 may better fit that trip. The generator and panel may ship separately, so plan around the complete kit arriving before departure.
Pros:
- 1,500W rated output is the highest among the three options.
- 1,024Wh capacity exceeds the other two kits by a wide margin.
- Included 200W panel has more rated solar input than either 40W panel.
- LiFePO4 battery, app controls, and multiple port types support varied campsite needs.
Cons:
- At about 23.3 lb, it is much less convenient to carry than the Explorer 300.
- High-draw cooking can still drain the battery quickly; exact runtime depends on the appliance.
- Generator and panel may ship separately, and emergency fast charging requires an app setting.
Best for: Car campers who want to run a compatible electric cooking appliance and also charge several devices from one larger station.
Not ideal for: Backpackers, cooks relying on appliances above 1,500W, or anyone expecting the 200W panel to rapidly replenish the battery during heavy use.
Bottom line: Choose the Jackery 1000 v2 when electric cooking flexibility matters more than low carry weight, while matching the appliance draw to its 1,500W limit.
“Choose the Jackery 1000 v2 when electric cooking flexibility matters more than low carry weight, while matching the appliance draw to its 1,500W limit.”
Portable Solar Generator with Panel, 300W Portable Power Station with Foldable Solar Panel 40W
The ZeroKor 300W kit is the budget-conscious-style choice in this lineup for buyers whose cooking plan stays within a modest power envelope. Its description lists a 280Wh battery and 300W AC output, and explicitly warns that appliances above 300W may damage the station. That warning matters: many electric kettles, hot plates, and coffee makers exceed this ceiling, so we should verify the appliance label before treating this as a cooking power source.Compared with the Jackery 1000 v2, this unit has less than a third of the stated capacity and one-fifth the rated output. That makes it a poor substitute for the higher-output model when cooking is central. Its more reasonable role is supporting small low-power meal-prep gear, lighting, and devices, though the product information does not specify a battery chemistry or weight for the 300W station.The included 40W foldable panel and multiple charging ports add flexibility, but solar recovery will be gradual, especially if we use the station while charging. The listing also bundles a separate 100W portable pack in its description, which adds a second device but does not clarify the larger station’s cooking capability. We would choose it for simple campsite power, not for a menu built around electric appliances.
Pros:
- Includes a foldable 40W solar panel.
- Provides two 300W maximum AC outlets plus USB and DC ports.
- The listing explicitly identifies the output limit, helping buyers screen appliances.
- Includes a separate 100W portable power pack according to the description.
Cons:
- 300W output excludes many common electric cooking appliances.
- 280Wh capacity is far below the Jackery 1000 v2’s 1,024Wh.
- The 40W panel is a modest input for replenishing the station during active use.
- The provided information does not state the 300W unit’s weight or battery chemistry.
Best for: Campers with a verified appliance below 300W who want a small-output station and bundled 40W panel for lights and device charging.
Not ideal for: Anyone planning to use a typical high-draw kettle, hot plate, hair dryer, water pump, or other appliance above the stated 300W limit.
Bottom line: Pick the ZeroKor for modest loads and campsite charging, but only consider cooking appliances whose draw is comfortably below 300W.
“Pick the ZeroKor for modest loads and campsite charging, but only consider cooking appliances whose draw is comfortably below 300W.”
Jackery Solar Generator 300 and 40W Solar Panel, 292Wh, 300W AC
The Jackery Explorer 300 puts portability first. At a listed 7.5 lb, it is the easiest station here to carry between a vehicle, picnic spot, or campsite. Its 292Wh battery is close to the ZeroKor’s 280Wh, but the Jackery pairs that capacity with a 300W rated output and a stated 600W peak. This makes it a sensible match for low-wattage meal preparation and camp electronics, not a general-purpose electric kitchen.For cooking, the important comparison is still with the 1000 v2: the Explorer 300’s 300W rating is one-fifth of that model’s 1,500W output. We should check both the appliance’s sustained draw and any startup surge. The included 40W panel can support slow replenishment, while the listing says a 100W panel can reach 80% in about 2.8 hours and the supplied 40W panel in about 7.5 hours. Those are stated charging estimates; sunlight and conditions affect actual results.Its LiFePO4 chemistry, 100W USB-C PD port, two AC outlets, and 120W car port make it well-rounded when our cooking needs are light and carrying comfort matters. Compared with the ZeroKor, its clearest edge is the specified low weight and more detailed battery-life and solar information. We should skip it if meals depend on a hot plate or kettle beyond 300W, or if longer cooking sessions call for more stored energy.
Pros:
- Listed 7.5 lb weight makes it the most portable option here.
- 292Wh capacity is slightly higher than the ZeroKor’s stated 280Wh.
- LiFePO4 battery with more than 4,000 charge cycles stated.
- 100W USB-C PD port and 120W car port broaden charging options.
Cons:
- 300W rated output limits cooking appliance choices.
- 292Wh capacity is much smaller than the Jackery 1000 v2.
- The included 40W panel is slow for replenishment compared with the 200W panel bundled with the 1000 v2.
Best for: Lightweight campers who want to carry a station easily and use only a verified low-wattage cooking device alongside personal electronics.
Not ideal for: Campers who need sustained electric cooking, more than 300W of continuous output, or a large energy reserve for multiple meals.
Bottom line: Choose the Explorer 300 when low weight and campsite convenience outweigh the need for higher-output or longer-running electric cooking.
“Choose the Explorer 300 when low weight and campsite convenience outweigh the need for higher-output or longer-running electric cooking.”
As an Amazon Associate we earn from qualifying purchases.
Before You Start
Check the power station’s continuous AC output and surge rating, its battery capacity in watt-hours (Wh), and the limits of each output port. Compare these with the appliance label. A device’s running wattage must stay within the station’s continuous output; appliances with motors or heating controls may need a brief surge allowance. If the manual does not give a compatible rating, choose another appliance or contact the manufacturer.
Estimate energy use before packing: multiply appliance watts by the hours it will run. For example, a 700-watt cooker running for 30 minutes uses about 350 Wh before conversion losses. The battery may need to supply more than that, so leave a reserve and check the station’s usable capacity. Solar panels recharge the battery; they do not guarantee steady cooking power when clouds, shade, or changing sun reduce input.
Keep the power station dry, shaded, stable, and away from hot cookware, splashes, and foot traffic. Place solar panels where they receive direct sun without blocking paths or creating a trip hazard. Do not connect equipment with damaged cables, and do not exceed the power station’s input or output ratings.
Step-by-Step Instructions
Step 1: Choose a compatible cooking appliance
Read the appliance label or manual and write down its voltage, running wattage, and any starting or surge requirement. Select an appliance whose requirements fit within the power station’s continuous output and outlet rating. For a first outing, a lower-wattage appliance with a short, predictable cooking time is easier to plan around than a high-power hob.
Tip:Heating appliances can draw close to their rated wattage for much of a cooking session. Do not assume that a short cooking time makes an overpowered appliance compatible.
Check: The appliance’s voltage and wattage fit the power station’s output specifications, with any stated surge requirement covered.
Step 2: Estimate the battery energy needed
Multiply the appliance’s watts by the expected running time in hours to estimate energy use in Wh. Add a practical reserve because power conversion, temperature, and appliance cycling affect the result. Compare the estimate with the station’s usable battery capacity, and account for other devices that will draw power during the meal.
Tip:If the appliance cycles on and off, its average use may be lower than its rated wattage, but plan using the rating unless you have reliable measurements from the same appliance and setup.
Check: The planned cooking session and other loads fit within the station’s usable capacity while leaving a reserve.
Step 3: Charge and inspect the power station
Charge the station using its approved wall charger or compatible solar panel. For solar charging, connect the panel only through the station’s designated solar input and stay within its voltage and current limits. Check the screen or indicator for charge level, then inspect the casing, outlets, panel, and cables for damage before packing.
Tip:Charging time varies with panel size, sunlight, angle, temperature, and battery level. Do not count on reaching full charge during a short stop outdoors.
Check: The station reports a charge level sufficient for the planned load, and all visible components are undamaged.
Step 4: Set up the cooking area
Place the station on a stable, dry surface in a ventilated outdoor area, protected from direct heat and splashes. Set the cooker on a firm, level surface with clear space around it. Keep the cable route short and out of walkways, and keep children, pets, loose fabric, and combustible materials away from hot surfaces.
Tip:Do not put the power station under a tarp that traps heat or where rain can reach it. Use weather protection only if the station’s manual permits it and ventilation remains clear.
Check: The station is stable and dry, the cooker is level, and cables do not cross walking paths or touch hot surfaces.
Step 5: Connect the appliance and check the load
Switch off the appliance. Plug it directly into the correct power station outlet, or use only a cord rated for the appliance and outdoor conditions if the manuals allow one. Turn on the station’s AC or DC output as directed, then switch on the appliance and watch the display for load watts, warnings, or an overload message.
Tip:Keep the load below the station’s continuous limit. Avoid adding a kettle, lights, or other high-draw device to the same station while cooking unless the combined load is within its rating.
Check: The appliance starts normally, the station displays a plausible load, and no overload or temperature warning appears.
Step 6: Cook while monitoring power and food
Follow the appliance’s cooking instructions and stay nearby while it operates. Check the station’s remaining battery level and load display during cooking. Use a food thermometer to confirm foods have reached a safe internal temperature, and keep raw food separate from cooked food.
Tip:If the station beeps, shows an overload or overheating warning, or the appliance behaves erratically, switch the appliance off. Unplug it only when safe, then consult the troubleshooting steps and manuals.
Check: The food cooks as expected, the station remains within its limits, and the battery retains enough charge to shut down and manage any remaining equipment safely.
Step 7: Shut down and pack the system
Switch off the cooking appliance and then the station output. Let hot cookware and the appliance cool before handling. Unplug by holding the plug, not pulling the cable. Disconnect the solar panel as the manual directs, wipe away moisture from compatible surfaces, and pack the station and cables in a dry place.
Tip:Do not store a wet, hot, or damaged power station. Follow the manufacturer’s storage charge guidance if the unit will sit unused.
Check: All outputs are off, hot parts have cooled, and the station and accessories are dry and stored without cable strain.
Common Mistakes to Avoid
- Choosing an appliance that exceeds the station’s continuous output. — Compare appliance wattage and surge needs with the station’s ratings before the trip; do not rely on outlet shape alone.
- Planning from battery capacity without accounting for cooking time or conversion losses. — Estimate watt-hours from rated power and expected run time, include other loads, and leave a reserve.
- Expecting solar panels to provide consistent power in shade or changing weather. — Charge the battery ahead of time and treat solar input as a variable recharge source.
- Placing the station near heat, water, or a walkway. — Choose a dry, shaded, stable location and route cables away from people, cookware, and hot surfaces.
Troubleshooting
Problem: The power station shuts off or shows an overload warning.
Solution: Switch off the appliance. Check its wattage against the station’s continuous output and surge limit, and disconnect other loads. Restart only after the load is within ratings; use a lower-power appliance if needed.
Problem: The battery drains faster than expected.
Solution: Check the displayed load and actual cooking duration. Reduce other devices, shorten preheating where the appliance instructions allow, and use a larger compatible station or a lower-power cooking method next time.
Problem: The solar panel is not charging the station.
Solution: Confirm the panel is connected to the solar input with the approved cable and within the station’s input limits. Move it into direct sun, clear obstructions, and check the display for input watts. Stop if a cable or connector is damaged.
Problem: The appliance does not start or behaves inconsistently.
Solution: Turn it off and check that the outlet type and voltage match, the plug is fully seated, and the station output is enabled. Review the appliance’s surge needs and manual. Do not keep retrying if the station reports a fault.
What Success Looks Like
The setup is successful when the appliance operates without overload or temperature warnings, the power station stays dry and ventilated, and the meal finishes with enough stored energy to shut the system down safely. Food should reach the safe internal temperature for its type, checked with a thermometer. After cooking, the station output is off and the equipment is cool and dry before storage.
Next Steps
After the outing, recharge the station according to its manual and inspect cables and connectors for wear. Record the appliance, cooking time, starting and ending battery levels, and solar conditions; these observations help you plan future meals. If the setup repeatedly runs short, choose a more efficient appliance, reduce cooking time, or increase battery capacity before relying on it for a longer trip.
Frequently Asked Questions
Can a solar generator run an induction cooker?
Sometimes. Check the cooker’s rated and peak wattage against the station’s continuous output and surge rating, then confirm the battery has enough usable Wh for the planned cooking time. Many induction cookers draw substantial power, so compatibility cannot be judged by battery capacity alone.
Can I cook directly from the solar panel?
Usually, the panel charges the power station’s battery, which then supplies the appliance. Sunlight varies, so the panel’s advertised output does not mean it can deliver steady cooking power. Follow the station manual and use its supported power path.
How much battery capacity do I need?
Estimate watt-hours by multiplying the appliance’s rated watts by expected hours of use, then allow for conversion losses and other loads. Compare that estimate with usable battery capacity, not just the headline capacity, and keep a reserve.
Is it safe to use a power station in a tent?
Follow the manufacturer’s placement guidance and do not cook inside a tent. Cooking creates fire, burn, and food safety risks, and tents can restrict ventilation or place equipment near flammable fabric. Set up in a suitable outdoor cooking area.